6 Post Processing Tips for Nature Photographers
Much like learning the controls of your camera, becoming proficient at post processing your images takes time. When delving into the world of photo editing, nature photographers typically make the mistake of doing either too much, or too little. With so many sliders, filters and tools at our disposal, it’s easy to get excited and ruin an image through aggressive or sloppy post processing. In the same vein, all of the features of Photoshop and Lightroom can be overwhelming and cause photographers to shy away from learning, resulting in unpolished images that don’t live up to their potential.
Of course, post production comes completely down to personal taste and your artistic vision should not be swayed by the opinions of others. The following reflects my preference for retaining and further revealing the authentic appearance of the natural world.
Here are a few tips I hope you can use to improve your images!
1. Double Check Your White Balance
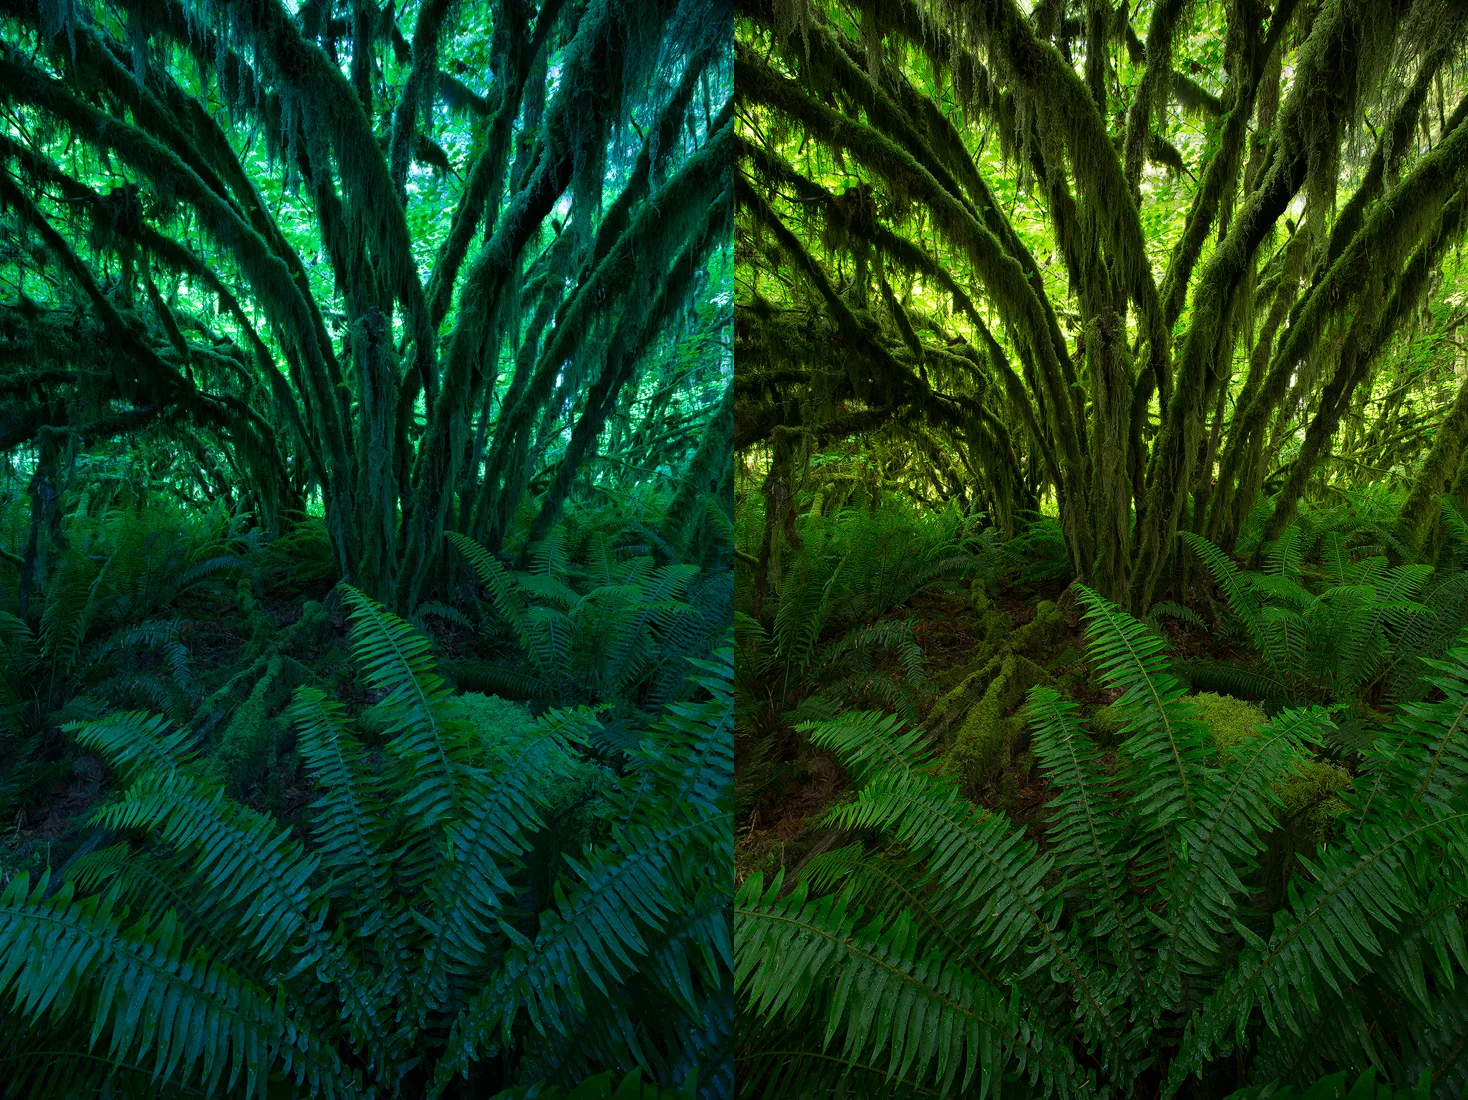
Properly setting your white balance in camera and also checking in with this during post production are two often-neglected steps. If you shoot jpeg, you are stuck with whatever your camera captured; whereas if you shoot your image in RAW (which I highly recommend), you are afforded the luxury of being able to change this after the initial capture.
The image on the left is an example of an incorrectly set white balance. The greens appear far too blue, whereas on the right, the white balance is set nearly 2000 kelvin warmer, rendering the cloudy filtered light more naturally.
2. Reduce Noise
The best wildlife activity usually coincides with early morning and evening hours when light is at a premium. Low light = high ISO settings, and high ISO settings = noisy images. Today’s sophisticated camera sensors are becoming more and more impressive when it comes to retaining good image quality in low light, but nevertheless it is still sometimes necessary to reduce the noise in our images to keep them looking clean.
This photo has been heavily cropped to show the difference. Taken at a high ISO, a considerable amount of grain can be seen on the left. Noise reduction has been selectively applied on the right. If you would like to view a video tutorial explaining my technique, click here to check it out on YouTube!
3. Look Out for Halos
A great way to improve your photographs is, instead of making global adjustments that effect the entire image, selectively adjust only certain portions of the image that need attention. For example, darkening down the background of this image could be a good way to strengthen it. However, if care isn’t taken, this can result in halos appearing along edges, as seen here...
4. Don't Oversaturate
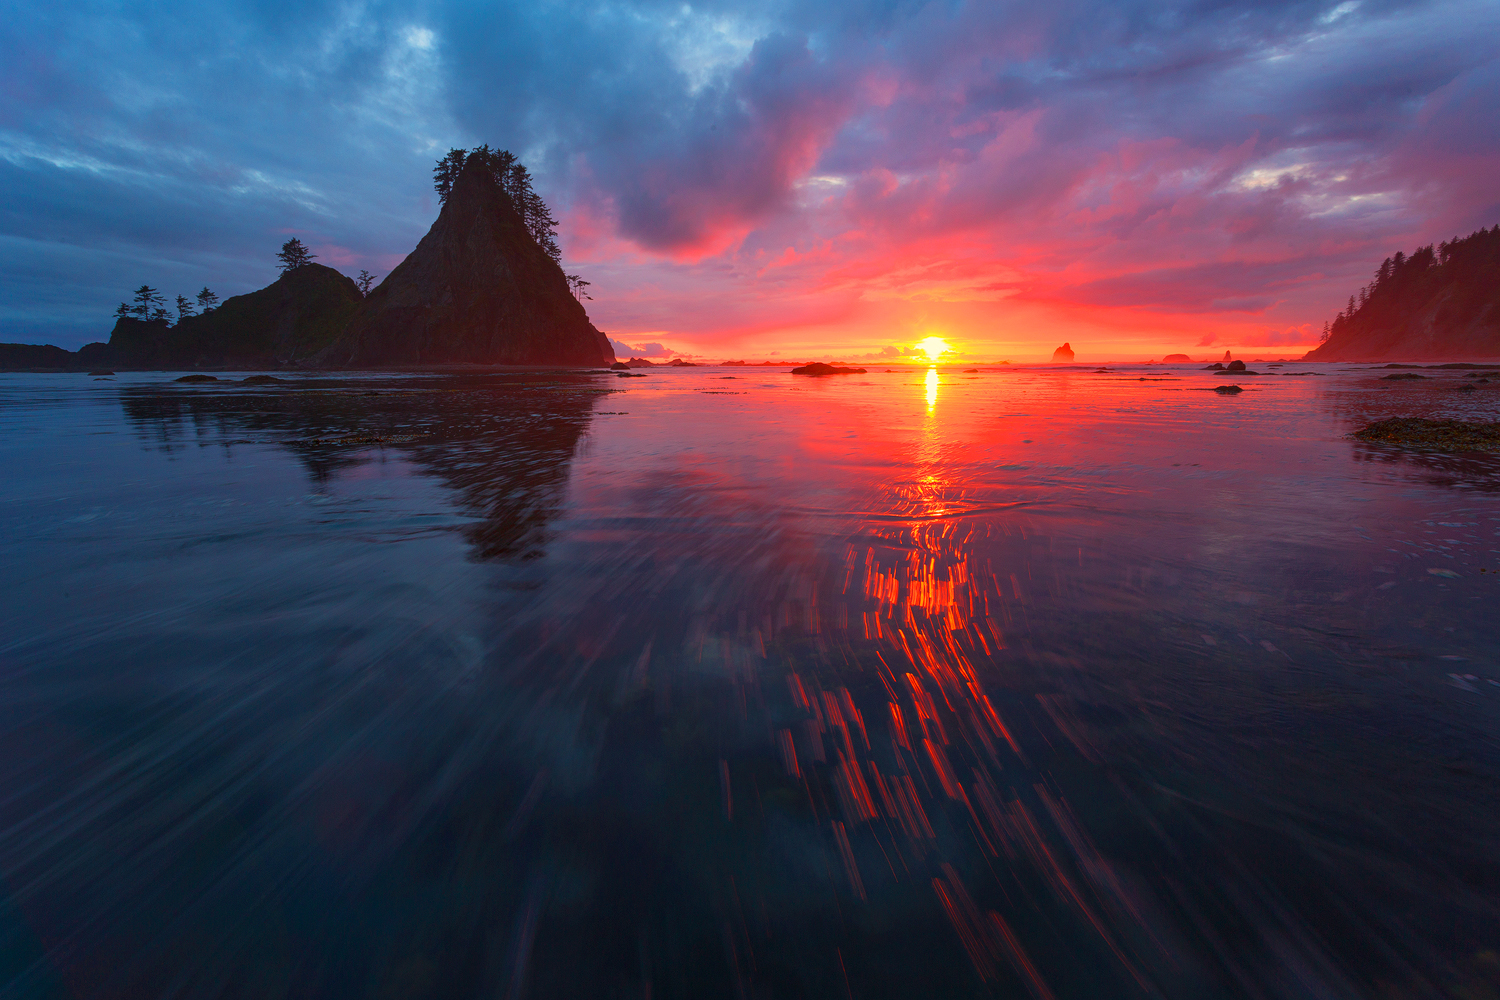
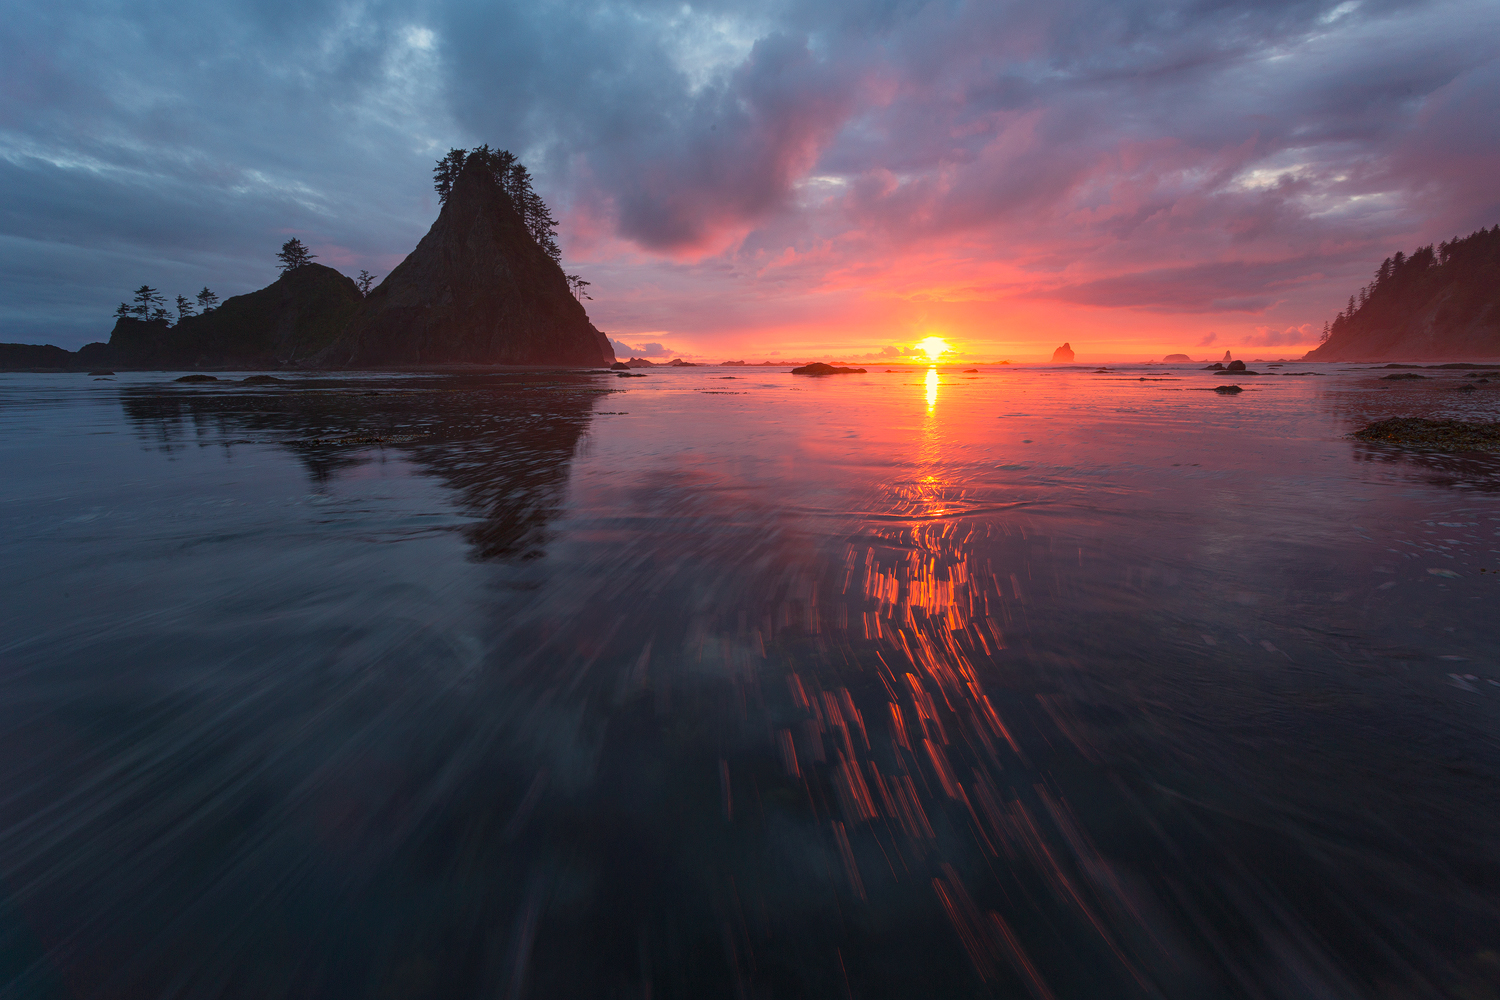
The world of photography has changed immensely over the last few years. The popularization of social media platforms such as Facebook, Twitter, Instagram - the list goes on, has made sharing images and gaining a following just a click away. In the race for likes and followers, there is growing trend amongst photographers of oversaturating images to a surreal point. While for some this is a matter of artistic vision, certainly for many this is motivated by an urge to outdo the previous sunset shot with even more dazzling colour and contrast.
The top image shows over-the-top saturation. While eye-catching, it doesn't naturally depict the light I experienced on this particular evening. The bottom image is an accurate representation of colour and contrast. While I see nothing wrong with accentuating elements of a scene, when done too aggressively, the photograph lacks one of the elements I find most important: the ability for the viewers to imagine stepping into the scene and experiencing the moment themselves.
5. Don't Oversharpen
The final step in the post processing workflow - one that can make or break the image. Though the comparison below is unpronounced, I find that the difference between proper and improper sharpening is subtle.
In the animated GIF above, the over-sharpened version causes the bear's fur to appear too coarse and the water looses its naturally smooth appearance.
Here are a couple quick tips to help you properly sharpen your images:
Avoid sharpening before you downsize your images to output resolution
Instead of sharpening the entire image, which can reintroduce noise to out-of-focus areas, selectively sharpen only in focus portions of the image. Using the Unsharp Mask filter in Photoshop or sharpening with the Adjustment Brush tool in Lightroom will help you achieve good results
6. Level the Horizon
There is nothing more frustrating than seeing an otherwise fantastic photograph let down by a crooked horizon line. This is of course mainly seen in landscape photographs but can also be an issue with wildlife images, especially when the water's surface is included. While shooting wildlife, it's sometimes necessary to get in awkward crouched positions, making it difficult to know if your image is in fact level. Additionally, we typically aren't referring to bubble levels or live view levels as we're busy looking in the viewfinder. It's such an easy fix that can really ensure your images are looking their best!
I really hope these tips have helped improve your post processing and take your images to the next level!
Click below to share this blog post on social media!


